

A clean DTF application comes from process control, not guesswork. When we prepare the garment, use true heat and even pressure, wait for a complete cold peel, and finish the design properly, the result is a smooth, durable print that looks ready for retail.
For small shops, Etsy sellers, and apparel creators, how to press DTF transfers correctly is a margin-protection skill. One rushed peel or uneven platen can ruin a blank, delay an order, and create a preventable reprint. Build a repeatable workflow instead, especially when you are pressing a batch of tees, uniforms, hoodies, or branded merch.
DTF Heat Press Settings at a Glance
For standard Five Star DTF transfers, start at 315°F for 15 seconds with firm to high pressure, then allow a full cold peel and use an optional five-second final press. Treat these settings as a tested baseline, then test every unfamiliar blank before production.
| Garment or Transfer | Starting Temperature | Initial Press | Peel |
|---|---|---|---|
| Cotton and cotton blends | 315°F | 15 seconds | Cold |
| Polyester activewear | 300°F | 10 to 12 seconds | Cold |
| Standard hoodies | 315°F | 15 seconds | Cold |
| Glitter DTF | 320°F | 8 to 10 seconds | Cold |
Our full DTF press instructions and troubleshooting guide lists 315°F, firm to high pressure, a three to five second pre-press, a 15-second application, cold peel, and an optional five-second final press. (fivestardtf.com)
Start With a Heat Press You Can Trust
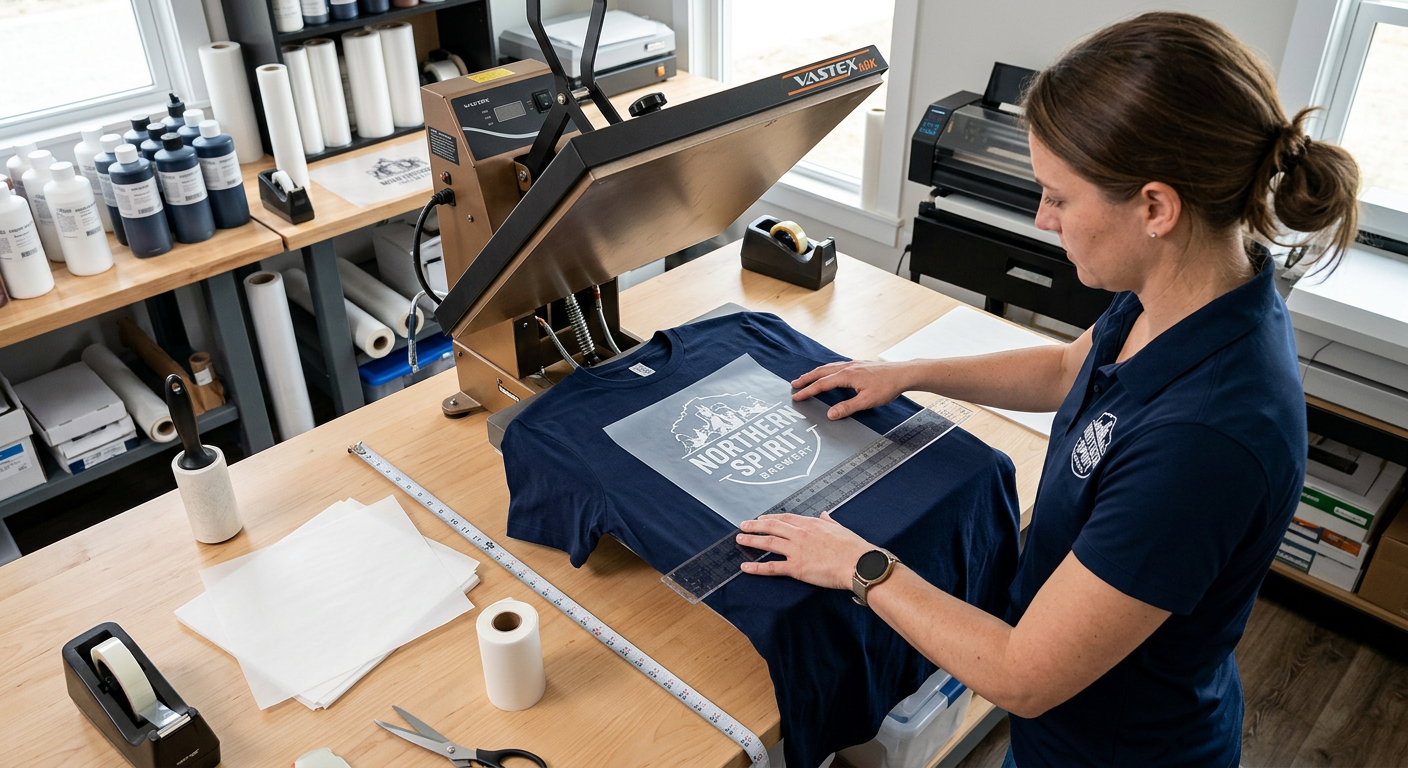
Accurate temperature and even pressure matter more than the number displayed on a heat press screen. Before a production run, let the press fully warm up, make sure the lower platen is level, and check that the upper platen contacts the full design area evenly.
A professional workflow begins with a test press on the exact garment you plan to sell. Cotton, fleece, polyester, and stretch blends all react differently. Record the blank brand, temperature, time, pressure, peel result, and final press result. That simple production note turns a successful test into a repeatable process.
The specific transfer supplier's instructions should always lead. For example, STAHLS lists 290°F for 12 to 15 seconds with medium pressure for its UltraColor MAX DTF product, which reinforces why different film and adhesive systems need their own tested settings. STAHLS Application Instructions (assets.stahls.com)
What to Keep at Your Press Station
Keep the basics within reach so you do not rush during an order:
- A reliable heat press with a clean platen
- A lint roller
- Parchment paper or a finishing sheet
- A collar ruler or T-square
- Heat-resistant tape for unusually shaped garments
- Scrap blanks for testing
- A simple settings log for repeat jobs
How to Press DTF Transfers Correctly, Step by Step
The strongest DTF result follows the same sequence every time: prepare, position, press, cool, peel, and finish. Skipping any part creates unnecessary risk, especially on detailed artwork and customer-supplied garments.
Prepare the Garment First
Pre-press the garment for three to five seconds. This removes moisture, smooths wrinkles, and creates a flatter surface for the adhesive to bond to. Use a lint roller after the pre-press, particularly on dark shirts, fleece, and hoodies that collect loose fibers.
Keep seams, pockets, zippers, drawstrings, and thick collar areas out of the pressing zone. These raised areas steal pressure from the artwork. If the print must sit near a seam, use a pressing pillow or pad to level the garment and test the setup before running the full order.
Position the Transfer Without Stretching the Fabric
Lay the garment flat and relaxed on the lower platen. Place the printed side against the fabric with the carrier film facing upward, then use a ruler or placement guide to confirm alignment.
Do not pull the shirt tight while positioning. Stretching a garment before pressing can distort the design once the fabric returns to its natural shape. For team orders and repeat client jobs, use the same placement reference on every shirt so the finished pieces look consistent.
Apply Firm, Even Pressure
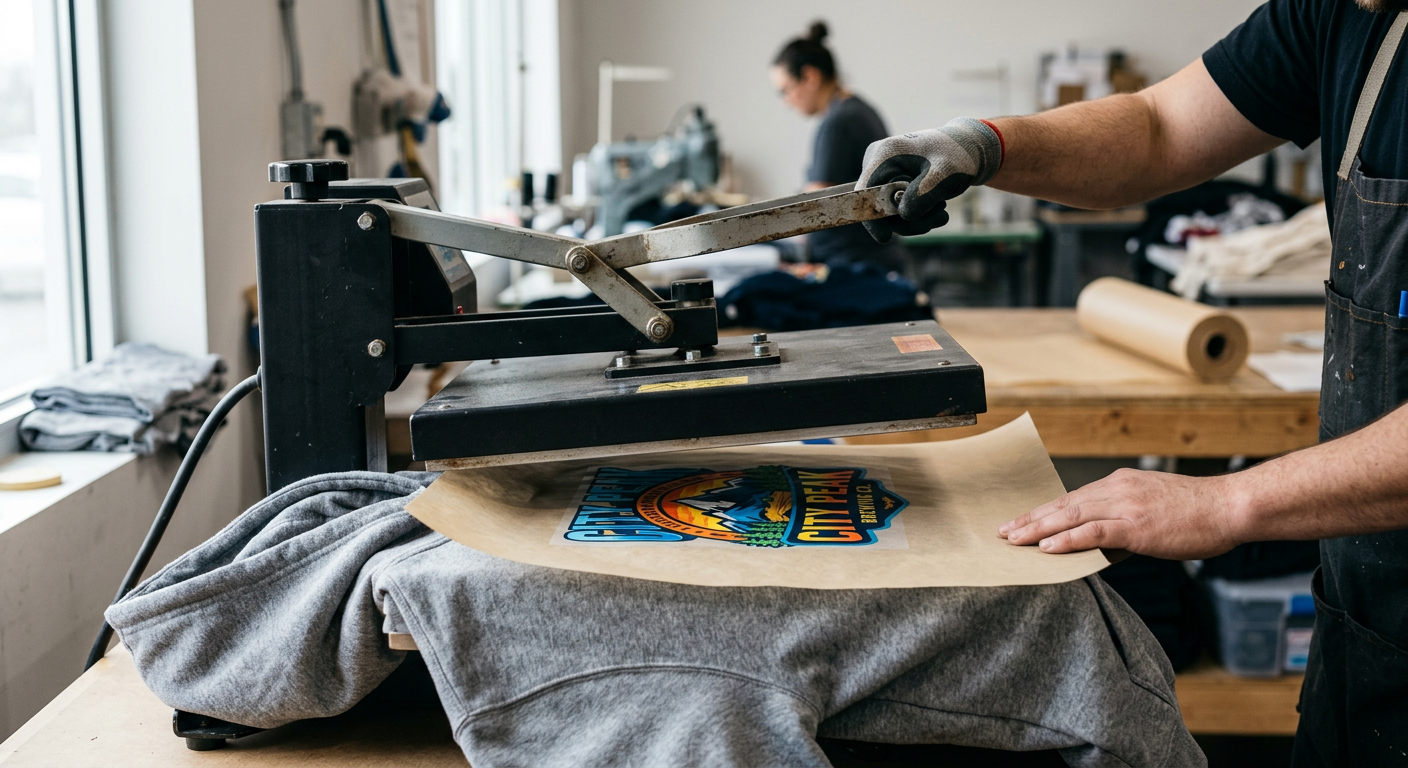
Close the press with firm to high, even pressure for the recommended dwell time. Pressure is not an afterthought. Heat activates the adhesive, but pressure brings the adhesive into full contact with the textile fibers.
If the center of the graphic adheres but the corners lift, the most likely issue is uneven pressure, not a bad transfer. Check for seams under the platen, confirm that the garment is flat, and make sure your press is not closing loosely.
Let the Film Cool Completely
Cold peel means fully cool to the touch. Give the carrier film time to cool before lifting a corner and peeling it back slowly, low, and evenly.
If a small detail begins to lift, stop immediately. Lay the film back down, cover if needed, repress for a few seconds, let it cool completely, and try again. Pulling harder will not fix incomplete adhesion.
Finish Press for a Retail-Ready Feel
After the carrier film is removed, cover the print with parchment paper or a finishing sheet and press again for about five seconds. This brief finish press helps smooth the surface, reinforce the bond, and create a cleaner matte appearance.
For a busy shop, this final step is worth the seconds it takes. It helps create a consistent hand feel across a batch and gives every garment a more polished finish before folding, bagging, or shipping.
Adjust Your Method for Fabric and Specialty Transfers
A standard cotton tee is forgiving, but polyester, hoodies, and glitter prints require more attention. Match the settings to the fabric and transfer type instead of assuming one formula fits every order.
Cotton and Cotton Blends
Cotton and cotton blends are usually the easiest place to begin. Use the 315°F, 15-second baseline with firm to high pressure, complete the cold peel, and apply the final press.
Check the surface after peeling. The graphic should look evenly bonded, with fine lines and edges sitting cleanly against the fabric. If the design looks under-bonded, improve pressure first before making major temperature changes.
Polyester and Performance Apparel
Polyester needs lower heat because it can develop shine, scorch marks, or dye migration. Start around 300°F for 10 to 12 seconds, use firm even pressure, and perform a test press on the same garment color and style.
Bright red, maroon, neon, and sublimated athletic apparel deserve extra caution. Keep the pre-press short, use a protective sheet for the finish press, and avoid adding heat just because a different cotton blank performed well.
Hoodies and Thick Fleece
Hoodies need a level pressing surface. Move drawstrings away from the platen, keep bulky seams clear, and use a pillow or pad if the print area is uneven.
Do not automatically add more heat to solve a thick-garment problem. Start by improving contact and pressure. The adhesive cannot bond consistently if the artwork sits above a seam or thick pocket edge.
Glitter DTF Transfers
Glitter DTF requires product-specific settings because excess pressure can flatten its sparkle. For Five Star DTF glitter transfers, begin at 320°F for eight to 10 seconds with medium-firm pressure, cold peel completely, then perform a second 15-second press at 320°F. (fivestardtf.com)
Use Glitter DTF Transfers for standout apparel when the project calls for a premium shimmer on spirit wear, boutique designs, dance apparel, or event merch. Keep standard DTF for highly detailed photo artwork when a softer, non-sparkle finish is the better visual fit.
Fast Fixes for Common DTF Pressing Problems
Most pressing failures can be corrected by identifying which part of the process broke down. Change one variable at a time, test again, and document the result rather than changing heat, time, pressure, and peel technique all at once.
The Edges Lift During the Peel
Increase pressure slightly and inspect the print area for seams, pockets, or wrinkles. Also make sure the garment was pre-pressed and that the carrier film cooled completely before you started peeling.
The Print Looks Cloudy or Dull
A hazy print is often the result of peeling too early. Allow more cooling time, then use a short parchment-covered finish press. If the issue remains, check the actual platen temperature with a dependable temperature tool.
Fine Details Stay on the Film
Fine lettering and small details need full, even contact. Recheck pressure, remove lint, level the garment, and verify that the artwork is not positioned over a seam. If the carrier film is lifting the detail, lay it back down and repress rather than forcing the peel.
The Garment Has a Shiny Press Box
This is common on polyester and delicate synthetics when heat or pressure is too aggressive. Lower the temperature, shorten the pre-press, and test with lighter pressure or a pressing pillow to reduce surface marks.
The Design Peels After Washing
Weak adhesion usually traces back to insufficient heat, insufficient pressure, moisture in the garment, or an incomplete final bond. Revisit the full process on a test blank before replacing the transfer or changing your production settings.
DTF Is for Fabric, UV DTF Is for Hard Surfaces
DTF transfers are made for heat application on apparel and textiles. UV DTF stickers are a separate product for smooth hard surfaces such as tumblers, glass, plastic, wood, metal, and packaging, and they do not belong under a heat press on shirts.
For product labels, drinkware, and branded hard goods, use UV DTF stickers for hard-surface customization. This distinction prevents a costly mix-up and helps your shop choose the correct decoration method for every order. (fivestardtf.com)
Questions We Hear at the Heat Press
Can we use an iron instead of a heat press?
An iron can work for small personal projects, but it is not the best choice for sellable apparel. It is difficult to maintain accurate heat and even pressure across the entire transfer, which makes adhesion less reliable.
Should we use a Teflon sheet for the initial press?
Follow the transfer supplier's instructions first. For the standard workflow described here, place the transfer directly against the garment for the initial press, then use parchment or a finishing sheet for the final press.
How long should we wait before washing a DTF shirt?
Wait at least 24 hours before the first wash when possible. Wash the garment inside out in cold or warm water, use mild detergent, avoid bleach, and tumble dry on a normal setting or hang dry when the garment label recommends it.
Can we press DTF on nylon or spandex blends?
Yes, but these fabrics need a careful test because they are more heat-sensitive than standard cotton. Start with lower heat, use a short test press, and follow the garment and transfer supplier guidance before pressing a full run.
What should we do if our press temperature is inaccurate?
Verify the platen with a temperature strip, probe, or infrared tool designed for heat press use. If the displayed setting and actual surface temperature do not match, adjust your working setting based on the verified platen temperature.
Does a final press make DTF more durable?
A short final press can improve the finished surface and reinforce the bond when the transfer instructions call for it. Use parchment or a finishing sheet, and avoid over-pressing heat-sensitive fabric.
Order Press-Ready Transfers From Tempe
We help Arizona creators, print shops, Etsy sellers, and apparel brands keep production moving with premium, press-ready transfers, fast production, no minimums, and free shipping on orders over $100. Order online at https://fivestardtf.com/product/dtf-transfers/
or pick up locally at 305 S Rockford Dr Ste B, Tempe, AZ 85281. Five Star DTF offers same-day production options for qualifying orders and local pickup in Tempe. (fivestardtf.com)
Summary
Pressing DTF transfers correctly means controlling the full application process, not simply setting a temperature. Pre-press the garment, lint-roll the surface, align without stretching, use firm even pressure, wait for a true cold peel, and finish press for a professional result.
When we test new blanks and keep reliable notes, we reduce waste and deliver consistent custom apparel. That discipline matters on every order, from one personalized shirt to a full run of uniforms.
About Five Star DTF
Five Star DTF is Arizona’s leading provider of
DTF transfers, Glitter DTF prints, UV DTF stickers,
and Sublimation transfers — offering same-day printing, fast nationwide shipping,
and convenient local pickup in Tempe, Arizona.
We proudly serve Tempe, Scottsdale, Phoenix, Mesa, Gilbert, Chandler, and all of Arizona,
helping creators, apparel brands, small businesses, and print shops produce premium, press-ready transfers with
vivid color, soft stretch, and long-lasting durability.
There are no setup fees, no minimum orders, and turnarounds are always fast.
Our Top Products
- DTF Transfers
- Glitter DTF Transfers
- UV DTF Stickers
- Sublimation Transfers
- Press Instructions & Tips
- Contact & Local Pickup
Artwork Help
Need your artwork cleaned, fixed, resized, or made print-ready? We offer background removal, vectorizing, color correction, and gang sheet layout.
Ready to Print?
Order DTF Transfers or
Upload Your Artwork to get started today.
All orders over $100 ship free — printed in Tempe, AZ and shipped statewide and nationwide.