

A glitter print can make a simple shirt feel like premium merchandise, but it also leaves less room for pressing mistakes. If the temperature is off, pressure is uneven, or the carrier film comes up too soon, the shine can lose its punch before the garment even reaches the customer.
That is why glitter DTF transfers how to use comes down to a repeatable process, not guesswork. We use a cold-peel, two-press workflow to help creators, Etsy sellers, apparel brands, and busy print shops produce clean, durable sparkle on shirts, hoodies, tote bags, and more.
Glitter DTF Transfers How to Use at a Glance
| Step | Starting Point | What Matters Most | Common Mistake |
|---|---|---|---|
| Pre-press | 3 to 5 seconds | Remove moisture | Skipping fabric prep |
| First press | 320°F, 8 to 10 seconds | Medium-firm pressure | Over-pressing the glitter |
| Peel | Fully cold | Slow, controlled removal | Peeling while warm |
| Final press | 320°F, 15 seconds | Parchment or Teflon cover | Skipping the finish press |
| Wash care | Cold, inside out | Gentle drying | High heat and bleach |
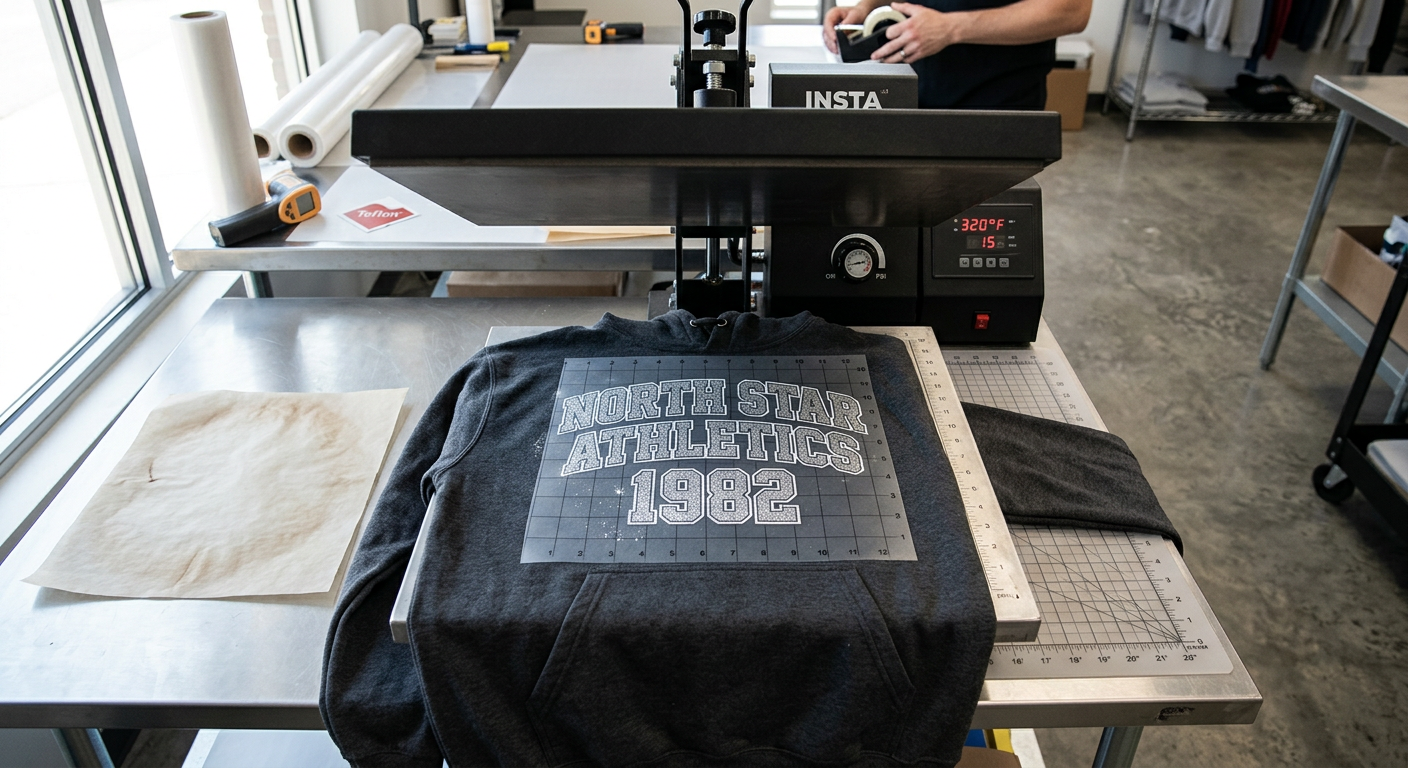
Five Star DTF’s product instructions specify 320°F for 8 to 10 seconds on the first press, a complete cold peel, then a 15-second finishing press at 320°F. The product is also described as wash-safe for more than 100 washes when it is applied and cared for correctly. See the full product details for Glitter DTF Transfers.
What Makes Glitter DTF Different?
Glitter direct-to-film transfers use a specialty glitter-coated film that gives every printed area a shimmering finish. Unlike glitter vinyl, there is no cutting, weeding, or stacking tiny pieces of material. You upload full-color artwork, receive a press-ready transfer, then apply it with a quality heat press.
Here is the key design consideration: the glitter effect appears across all printed portions of the design. Light colors, white ink, and pastels typically reflect the most sparkle. Darker shades still shine, but with a more subtle, dimensional finish.
We recommend glitter heat transfers for spirit wear, dance teams, boutique drops, birthday shirts, holiday collections, cheer apparel, and logos that need more visual impact than a standard print. For an everyday full-color option without the sparkle effect, compare our press-ready DTF transfers.
What You Need Before Pressing
A reliable setup is simple, but every part matters. Gather your garment, glitter transfer, heat press, parchment paper or a Teflon sheet, lint roller, and a pressing pillow if you are working around zippers, seams, or thick hoodie pockets.
Use a Heat Press, Not a Household Iron
A household iron creates uneven heat and inconsistent pressure. Glitter films need full, even contact across the entire design, especially around fine lettering and small details. A clamshell, swing-away, or drawer heat press is the right tool for production-quality results.
Check the Actual Platen Temperature
Your press display is a starting point, not a guarantee. Verify the platen periodically with a heat-resistant temperature strip or a compatible probe, especially if you notice inconsistent adhesion. Small temperature differences can affect the bond, fabric finish, and glitter texture.
Prepare the Garment Surface
Lint and moisture create weak spots beneath a transfer. Lint-roll the print area, then pre-press for 3 to 5 seconds to smooth the fibers and drive off moisture. Let the garment settle flat before positioning the transfer.
The Step-by-Step Pressing Method
Pre-Press the Garment
Set your press to 320°F and use medium-firm pressure. Pre-press the garment for 3 to 5 seconds, then lint-roll the area once more if needed. This quick preparation step is especially valuable for cotton fleece, hoodies, and garments that have been stored in humid conditions.
Position the Glitter Transfer
Place the design ink-side down on the garment. Keep the carrier film smooth and avoid touching the adhesive side. For a centered adult front design, a common reference point is roughly 2.5 to 3 inches below the collar, but always adjust for garment size, neckline, and artwork shape.
Apply the First Press
Press at 320°F for 8 to 10 seconds with medium-firm pressure. Your goal is secure adhesive contact without crushing the glitter surface. If your press has a pressure gauge, avoid treating maximum pressure as the default. Too much force can flatten the sparkle and leave the design looking less lively.
Let the Film Cool Completely
This is the patience test. Glitter DTF from Five Star DTF is a cold-peel product, so leave the garment undisturbed until the carrier film is fully cool to the touch. Peeling early can pull up portions of the print and create a rough, uneven edge.
Peel Slowly and Inspect the Print
Start at one corner and pull the carrier film back low and steadily rather than straight upward. Watch the fine details, thin lettering, and outer edges as you peel. If any portion lifts, lay the film back into position, cover it, and give it another short press before attempting the peel again.
Complete the Final Press
Cover the exposed design with parchment paper or a Teflon sheet. Press for 15 seconds at 320°F to set the print, improve the bond, and give the finished garment a polished feel. Let it cool before folding or packaging.
Fabric-Specific Tips That Save Reprints
Cotton and Cotton Blends
Cotton is generally forgiving and gives glitter prints strong visual contrast. Use the standard workflow, but check that textured garments are fully flattened before pressing. Ribbed fabric, heavy seams, and thick collar areas can prevent even contact.
Polyester and Performance Apparel
Polyester can be heat-sensitive and may show dye migration on certain garments. Test one transfer on a scrap or sample shirt before committing to a full run. If the fabric shows heat marks, reduce the temperature slightly, extend the press only if needed, and use a protective cover sheet.
Hoodies, Sweatshirts, and Thick Garments
Seams, drawstrings, pockets, and fleece texture can create pressure gaps. Use a pressing pillow or thread the garment over the lower platen so the print area sits flat. A strong first press depends on even contact, not simply longer press time.
Troubleshooting Glitter DTF Problems
The Transfer Lifts During the Peel
The usual causes are peeling before the carrier is cold, too little pressure, or uneven platen contact. Reposition the carrier film, cover it with parchment, and press briefly. Then allow a full cool-down before peeling again.
The Glitter Looks Dull or Flattened
Excessive pressure can reduce the reflective finish. Lower your pressure slightly on the next garment while keeping temperature and timing consistent. Always test a single shirt when you change presses, garment brands, or transfer materials.
The Edges Do Not Fully Bond
Inspect for lint, moisture, seams, or warped platens. A pre-press and lint roll solve many edge failures before they begin. If the design crosses a seam or zipper area, use a pillow to level the print zone.
The Shirt Has a Press Box or Shine Mark
This happens most often on heat-sensitive polyester or dark garments. Use a cover sheet, reduce heat when appropriate, and avoid leaving the garment under the platen longer than required. A test press is less expensive than replacing a full order.
Wash Care for Long-Lasting Sparkle
Wait at least 24 hours before the first wash so the adhesive has time to stabilize. Wash glitter DTF apparel inside out in cold water with mild detergent. Tumble dry low or hang dry, and avoid bleach, fabric softener, and high dryer heat.
For customer orders, include a small care card in each package. It takes seconds to add, reduces avoidable support messages, and helps protect the premium look that made the garment worth buying in the first place.
Why Small Shops Choose Press-Ready Glitter Prints
Running a small apparel business means protecting margin and production time. Glitter DTF lets you offer detailed, full-color sparkle without investing in weeding labor, specialty vinyl inventory, or large minimum quantities.
At Five Star DTF, we print in Tempe for local creators across Phoenix, Mesa, Gilbert, Chandler, Scottsdale, and the surrounding area. Eligible orders placed by the posted cutoff can qualify for same-day production, and local pickup is available at 305 S Rockford Dr Ste B, Tempe, AZ 85281. For complete standard transfer settings and troubleshooting, keep our DTF pressing instructions close to your heat press.
Order Press-Ready Glitter Transfers From Tempe
Ready to put more shine into your next collection? Upload your artwork and order Glitter DTF Transfers for press-ready, full-color sparkle, with local pickup in Tempe and fast nationwide shipping. We offer no setup fees, small-order flexibility, and free shipping on orders over $100.
Order online: https://fivestardtf.com/product/dtf-transfers/
Local pickup: 305 S Rockford Dr Ste B, Tempe, AZ 85281
Frequently Asked Questions
Can we use glitter DTF transfers on black shirts?
Yes. Glitter DTF works especially well on black and other dark garments because the contrast makes the shimmer stand out. The white underbase supports vivid color while the glitter film adds reflective depth.
Do glitter DTF transfers need a cold peel?
For Five Star DTF glitter transfers, yes. Let the carrier film cool completely before peeling. This protects fine details and helps prevent the transfer from lifting.
Can we press glitter DTF on polyester?
Yes, but test first because polyester can be heat-sensitive and may experience dye migration. Use a protective sheet, avoid excessive heat, and adjust settings carefully for the specific garment.
Can we layer standard DTF over glitter DTF?
Layering is possible for selected designs, but it requires testing because multiple layers increase thickness and change the finish. For the cleanest result, plan separate color areas carefully and allow each layer to cool before adding another.
Why is our glitter transfer peeling after washing?
Poor adhesion usually traces back to insufficient pressure, an inaccurate platen temperature, moisture in the garment, or peeling before the film cooled. Use the complete pre-press, cold-peel, and final-press workflow before evaluating wash durability.
Can we use UV DTF stickers on T-shirts?
No. UV DTF stickers are made for smooth, hard surfaces such as tumblers, glass, metal, and plastic, not fabric. For apparel, use heat-applied DTF; for drinkware and packaging, explore UV DTF stickers.
The Bottom Line
Glitter DTF succeeds when we respect the fundamentals: clean fabric, verified heat, controlled pressure, a complete cold peel, and a proper finishing press. Once that workflow becomes routine, you can create high-impact custom apparel without slowing down your production line.
Start with one sample, record the settings that work on your press, and build from there. That small discipline turns sparkling ideas into consistent, resale-ready garments.
About Five Star DTF
Five Star DTF is Arizona’s leading provider of
DTF transfers, Glitter DTF prints, UV DTF stickers,
and Sublimation transfers, offering same-day printing, fast nationwide shipping,
and convenient local pickup in Tempe, Arizona.
We proudly serve Tempe, Scottsdale, Phoenix, Mesa, Gilbert, Chandler, and all of Arizona,
helping creators, apparel brands, small businesses, and print shops produce premium, press-ready transfers with
vivid color, soft stretch, and long-lasting durability.
There are no setup fees, no minimum orders, and turnarounds are always fast.
Our Top Products
- DTF Transfers
- Glitter DTF Transfers
- UV DTF Stickers
- Sublimation Transfers
- Press Instructions & Tips
- Contact & Local Pickup
Artwork Help
Need your artwork cleaned, fixed, resized, or made print-ready? We offer background removal, vectorizing, color correction, and gang sheet layout.
Ready to Print?
Order DTF Transfers or
Upload Your Artwork to get started today.
All orders over $100 ship free, printed in Tempe, AZ and shipped statewide and nationwide.